
DustRam® King of Dust Free Tile Removal
Dust Free Tile Removal Tools & Equipment
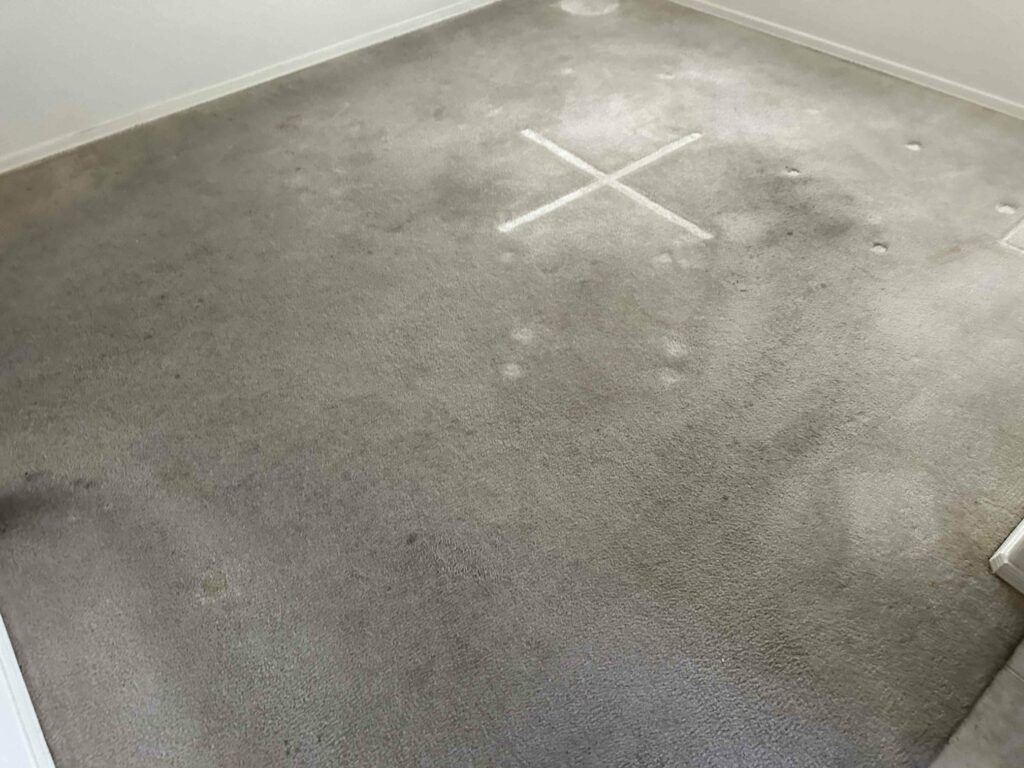
Embarking on a DIY carpet removal project can be a transformative experience for your home. It’s a task that requires careful planning and execution to ensure safety and efficiency. In this comprehensive guide, we will walk you through the entire process of removing carpet, focusing on every detail to make this DIY project manageable and successful. With DustRam®’s expertise in dust-free flooring solutions, you’ll be equipped with professional insights to ensure a clean, safe, and efficient carpet removal experience. Follow along to learn how to remove carpet safely and efficiently with the industry leader!
Proper preparation is crucial for a smooth carpet removal process.
– a utility knife with a sharp blade for cutting the carpet
– pliers for pulling it up
– gloves to protect your hands
– a dust mask
– safety goggles to shield against dust and debris
Consider the disposal or recycling of your old carpet. Research local carpet recycling programs or think creatively about how you can repurpose it. For instance, good-conditioned sections can be turned into area rugs or mats.
Next, clear the room. Remove furniture and any obstacles that might hinder your movement. This step is crucial for creating a safe working area and preventing any accidents. Pay special attention to doors, including closet and bathroom doors, as they need to be removed to provide unobstructed access.
If your room has shoe molding (also known as quarter-round molding), it should be carefully removed to avoid damage. This can be done using a pry bar and a hammer. Be gentle and try to keep the molding intact for reinstallation later.
Related Post: A Guide on the Best Flooring Options for Kitchens
Knowing your carpet type and how it was installed is pivotal for a smooth removal process. Carpets are typically installed in two ways: they are either glued down or tacked.
Glued carpets are more challenging to remove due to the adhesive used. This type might require more force and patience, especially when dealing with the adhesive residue left on the subfloor. Tacked carpets are usually easier to handle, as they are held in place by tack strips along the room’s perimeter.
It’s also essential to understand the carpet material, as this can affect the ease of removal. For instance, natural fibers might tear more easily than synthetic ones, requiring a more delicate approach.
Related Post: Choose the Right Flooring for Your Home
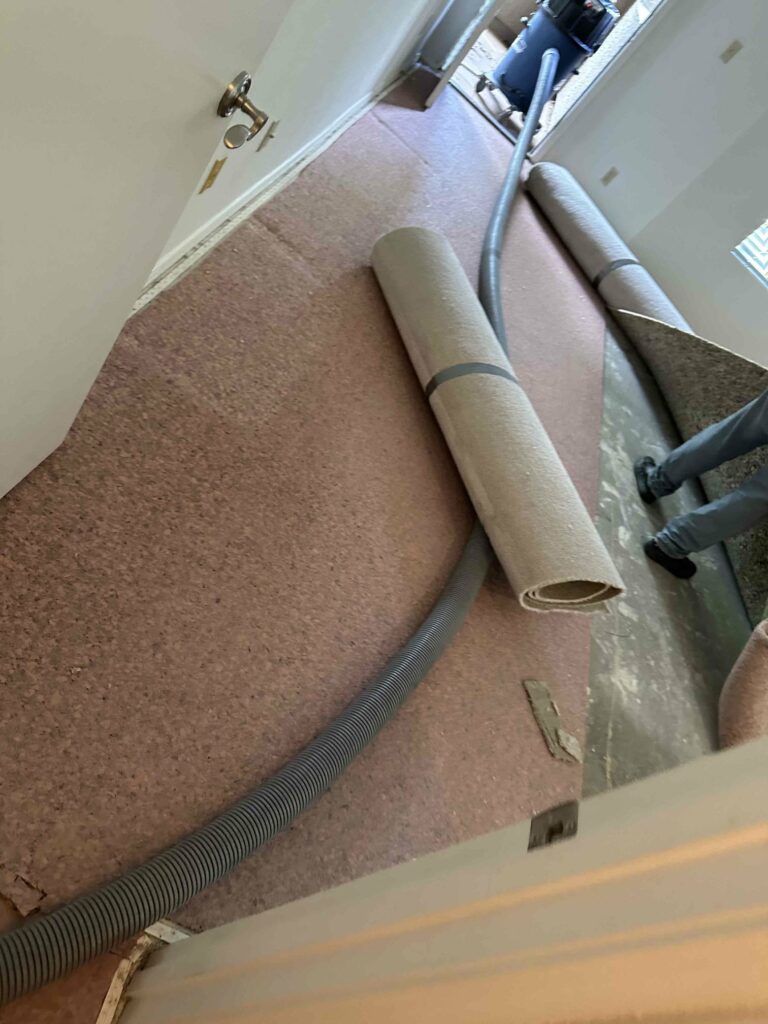
Start by using your utility knife to cut the carpet into strips about 4 feet wide. This makes the carpet easier to handle and remove. Begin in a corner of the room, where you can use pliers to grip and pull the carpet away from the tack strips. Be cautious of the sharp tacks and nails in the strips.
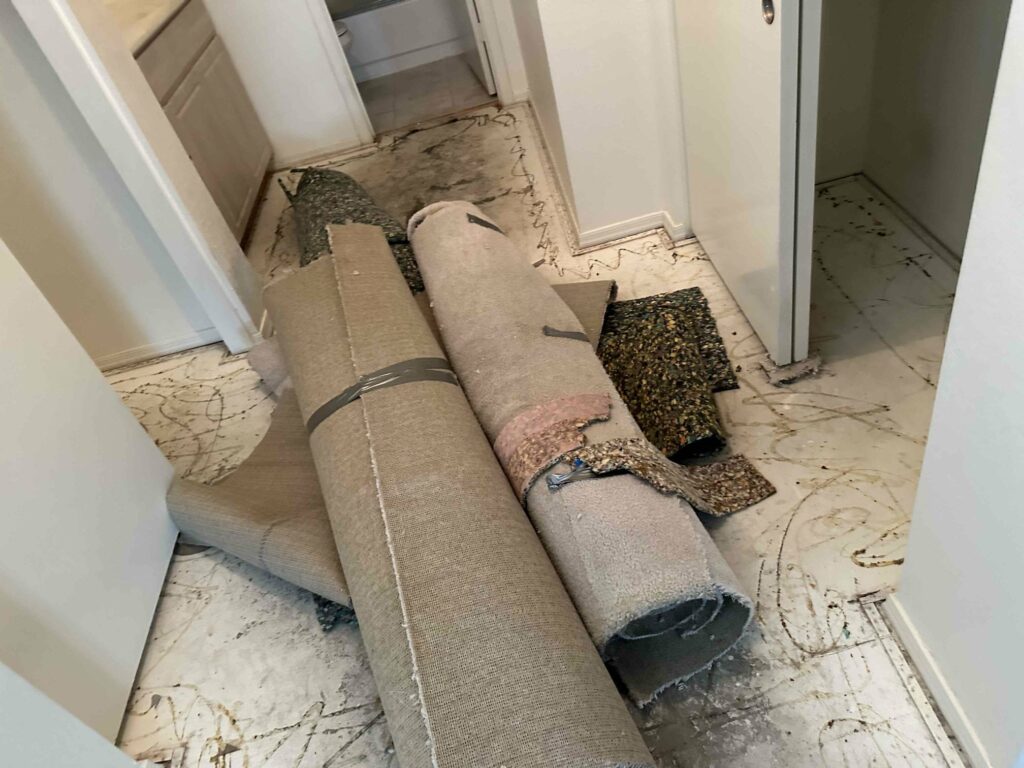
Once you’ve detached a section of the carpet, roll it up for easier disposal. If recycling, ensure the carpet is clean and free of any debris before taking it to the recycling center.
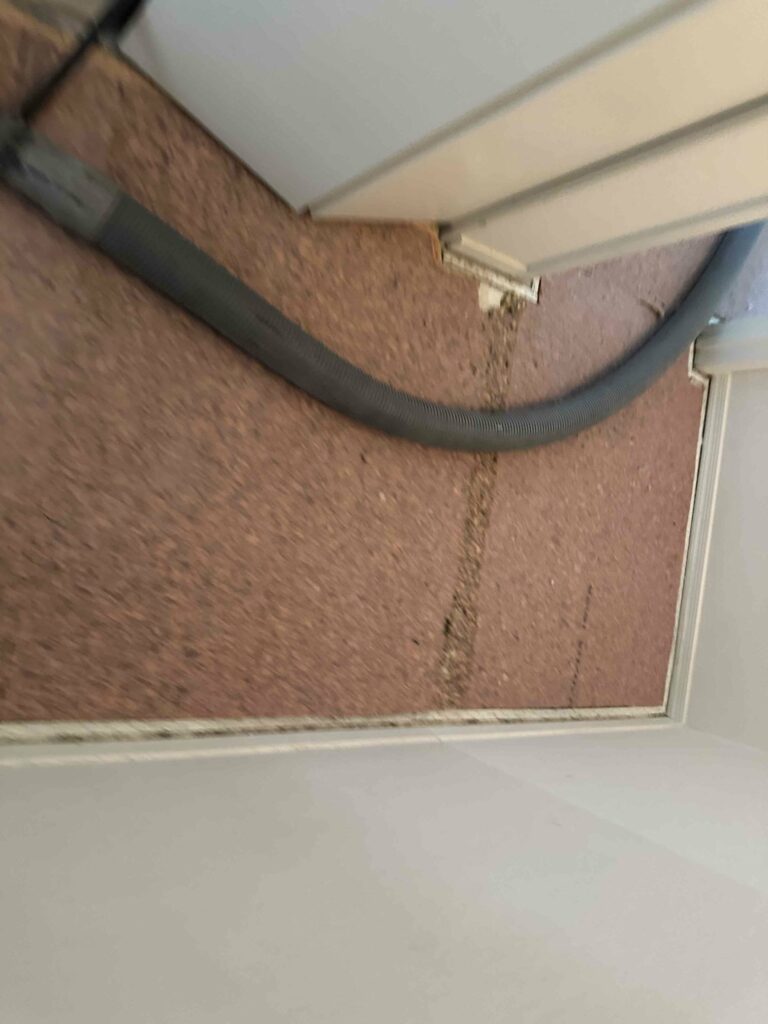
After the carpet is out, focus on removing the padding. If your subfloor is wood, the padding is likely stapled down. Use a staple remover or pliers to remove the staples. For concrete subfloors, the padding may be glued down, requiring a floor scraper to remove any adhesive residue.
This phase can be dusty, especially if the carpet and padding have been in place for many years. To protect your health and ensure a clean workspace, DustRam®’s dust control systems can be invaluable here, capturing fine particles and maintaining air quality.
Related Post: Signs its Time to Replace Your Flooring
Common challenges in carpet removal include dealing with stubborn adhesives, particularly with glued-down carpets, and removing underlay that may be stuck to the subfloor. Tools like adhesive removers or power oscillating tools can be helpful for these tougher parts of the job.
Another challenge can be the tack strips. If they are damaged or you’re changing the flooring type, they’ll need to be removed. Use a pry bar and hammer to gently lift and remove them. Be cautious of the sharp nails and potential splinters from the wood strips.
Throughout these challenges, maintaining a dust-free environment is crucial for your health and the cleanliness of your space. This is where DustRam®’s dust-free solutions shine, capturing over 99.9995% of dust particles, significantly reducing the risk of respiratory issues and keeping your workspace clean.
Related Post: How Silica Dust Exposure From Flooring Removal Can Harm You
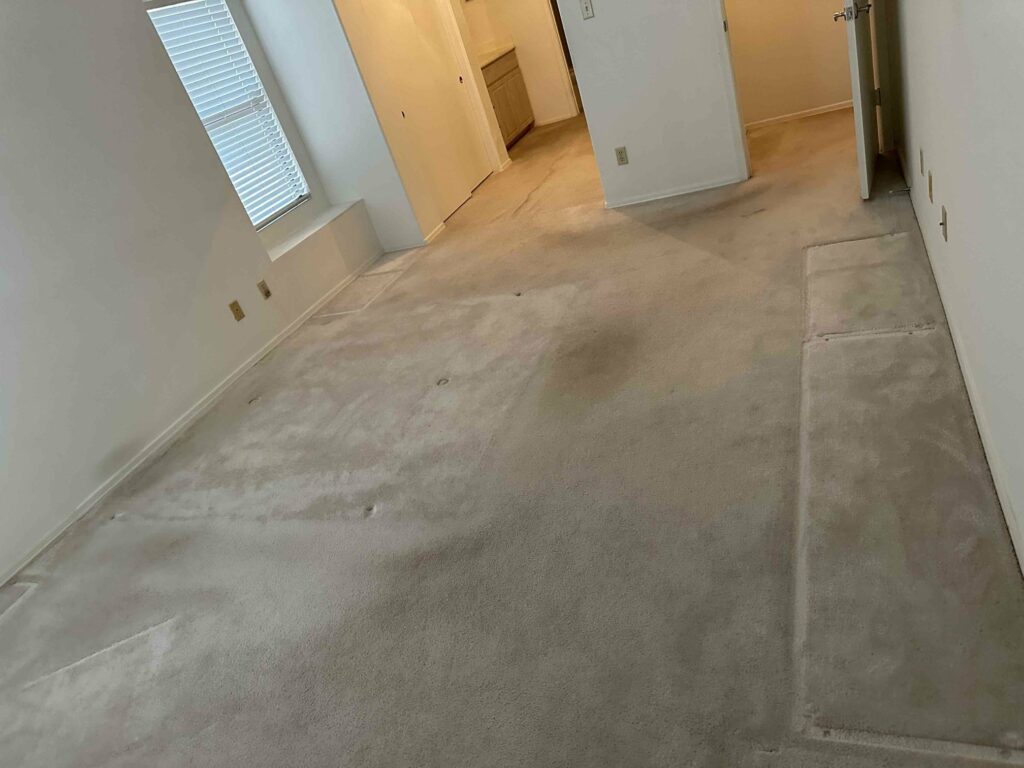
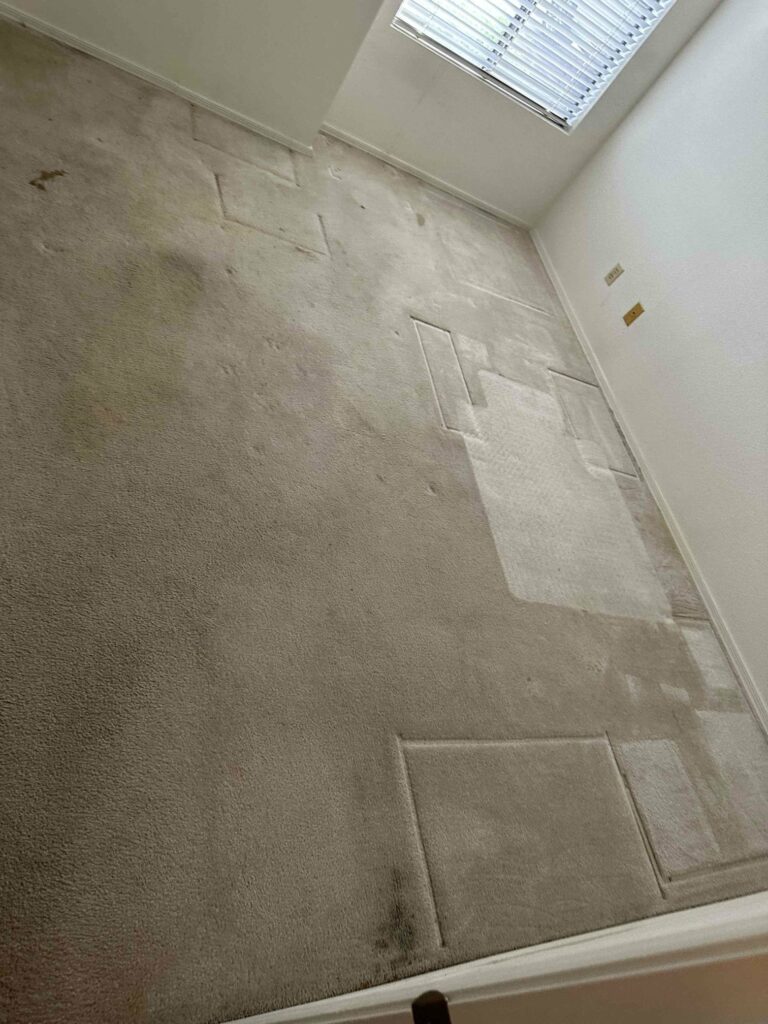
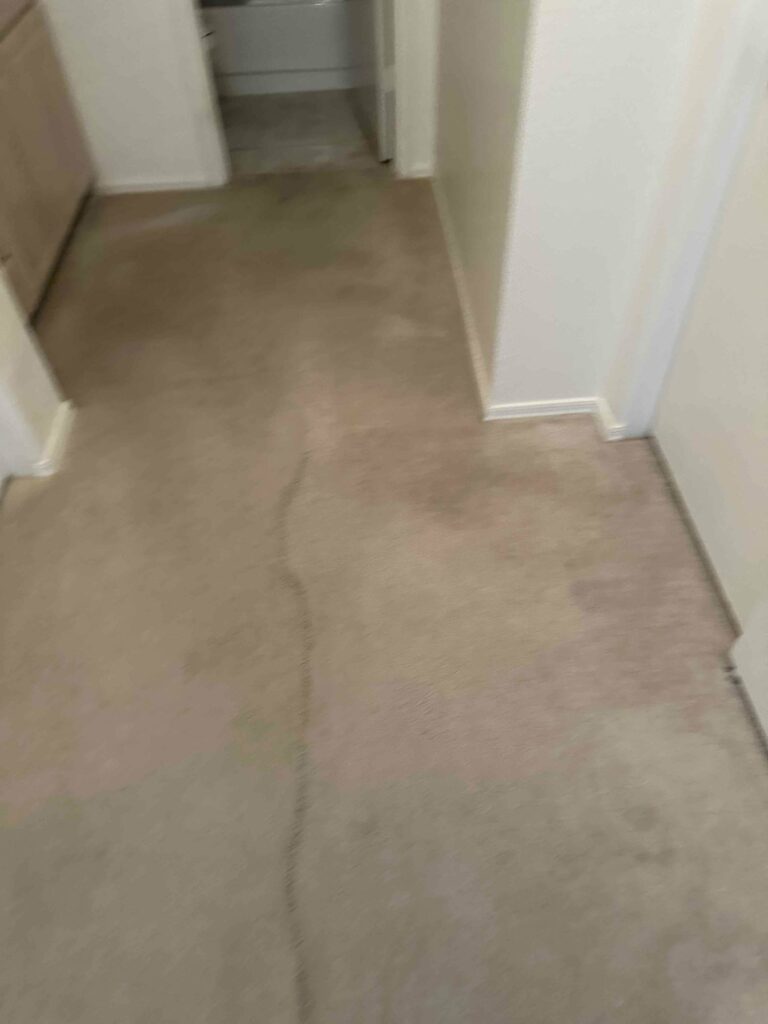
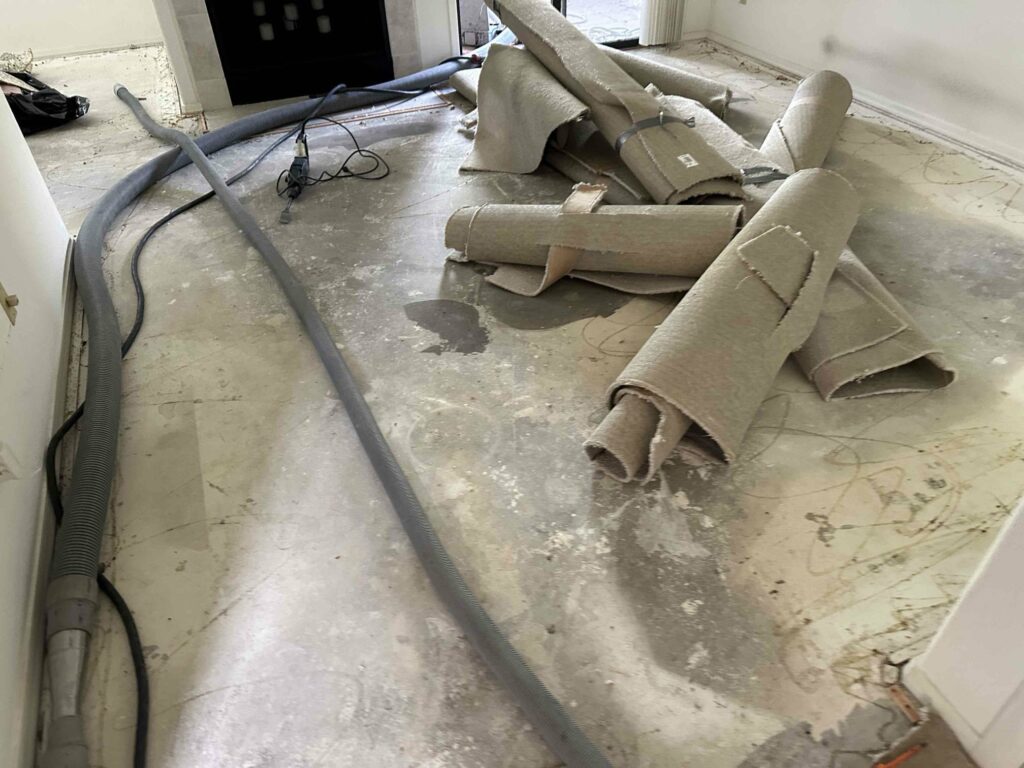
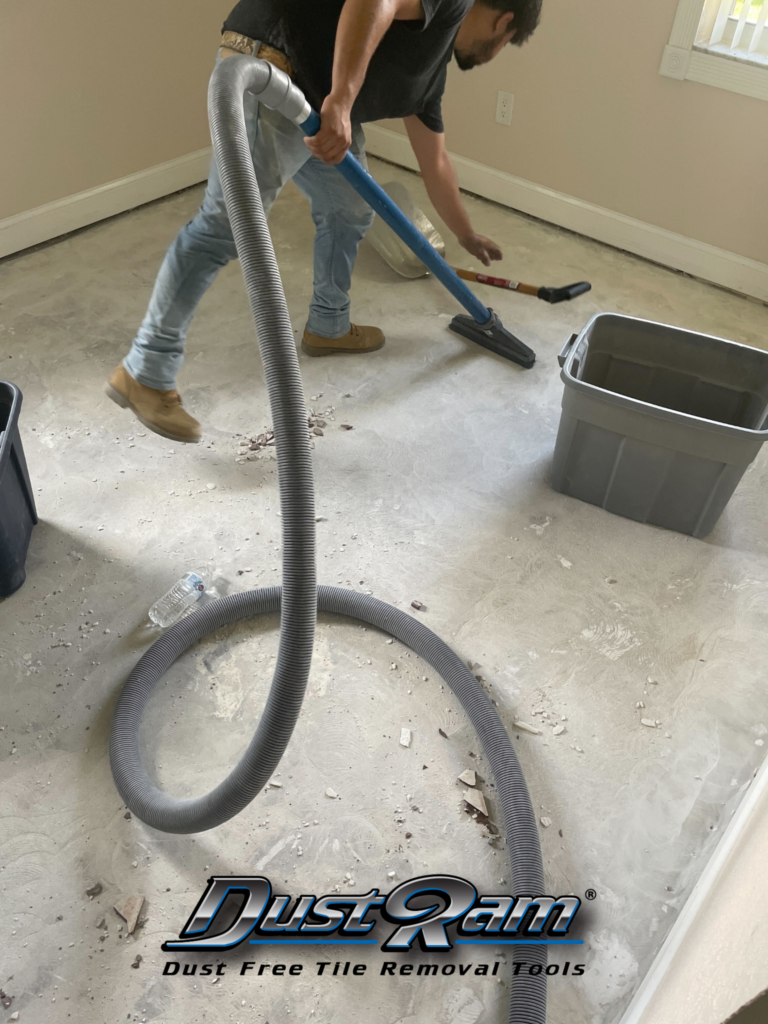
With the carpet and padding removed, you’re left with the bare subfloor. This is an ideal time to clean and prepare it for your new flooring. Start by vacuuming to remove any leftover debris, dust, or particles. A shop vacuum can be effective, but for optimal dust control, DustRam® equipment is unparalleled.
Inspect the subfloor for any damage, such as cracks, holes, or loose panels. This is the perfect opportunity to make repairs, ensuring a solid and even base for your new flooring. Address any squeaks or loose areas, as they can affect the longevity and performance of your new floor.
https://www.dustram.com/blog/subfloor-prep/
At DustRam®, we pride ourselves on providing top-tier solutions for dust-free flooring removal. Our patented technology ensures that a staggering 99.9995% of silica dust is captured during the removal process. This level of efficiency not only maintains the cleanliness of your project area but also significantly reduces health risks associated with dust inhalation.
Our solutions are not limited to tile removal; we extend our expertise to various flooring removal scenarios, including carpet. By using DustRam® equipment, you ensure a safer, cleaner, and more efficient removal process, whether you’re dealing with carpets, tiles, or other flooring materials.
dapibus leo.
Removing carpets is a significant step towards revamping your space. By following these detailed steps and prioritizing dust control, you ensure a successful, clean, and safe removal process. Remember, DustRam® is here to assist you with advanced dust-free flooring solutions, making your DIY projects healthier and more efficient.
Ready for a dust-free carpet removal experience? Contact DustRam® today. Our professional services and advanced technology guarantee a clean, healthy environment during your flooring renovations. Let us help you take the first step towards a cleaner, safer home.
Don’t settle for a less-than-perfect carpet removal, contact DustRam® and get a free project quote today. We will do the job dust free, provide top-quality floor prep, and we will get it right the first time. For more related content about “how to remove carpet” and other flooring, make sure to visit our blog for the latest news and trends on flooring removal.
When it comes to remodeling your home, a dust-free tile removal service is an excellent way to avoid the dust storms associated with traditional tile removal methods. While there are many aspects to this innovative service, one that can’t be overlooked is proper sub-floor preparation. By preparing your sub-floor adequately, you are setting the stage for an easy, clean, and successful flooring project.
Sub-floor preparation refers to the process of making sure the sub-floor, or the base upon which your tiles will be laid, is ready to receive the new flooring. This step is crucial because the condition of the sub-floor can significantly influence the longevity and quality of your new floor installation.
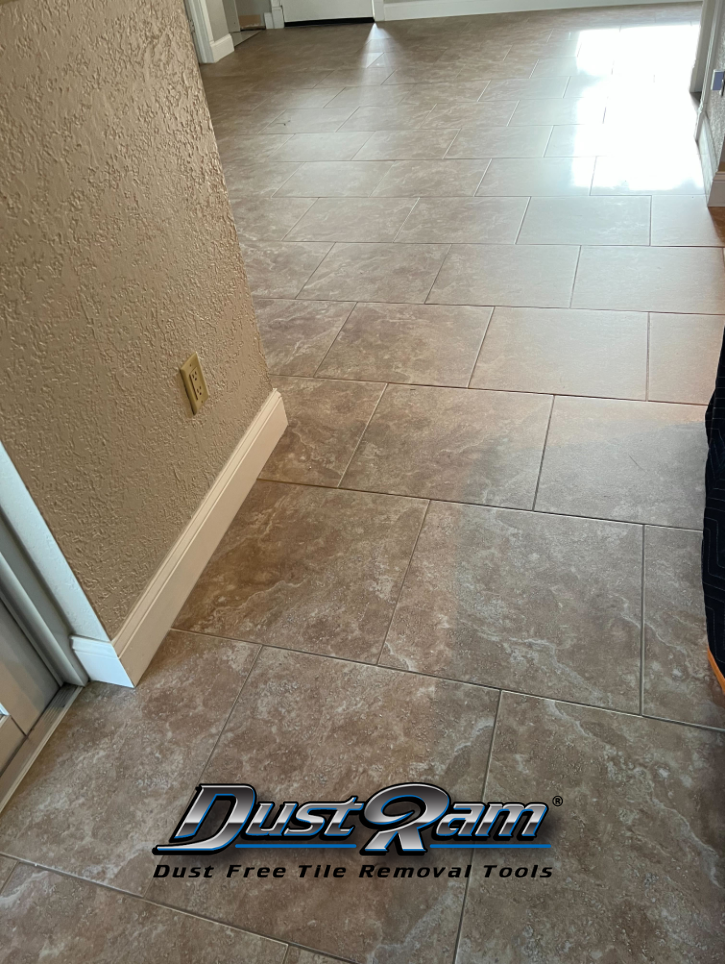
When you remove tiles using a dust-free tile removal service, you get a clean and dust-free environment, unlike traditional methods that can leave your space filled with dust for days. But the benefits don’t stop there. With a service like DustRam® dust-free tile removal, the sub-floor preparation is unparalleled.
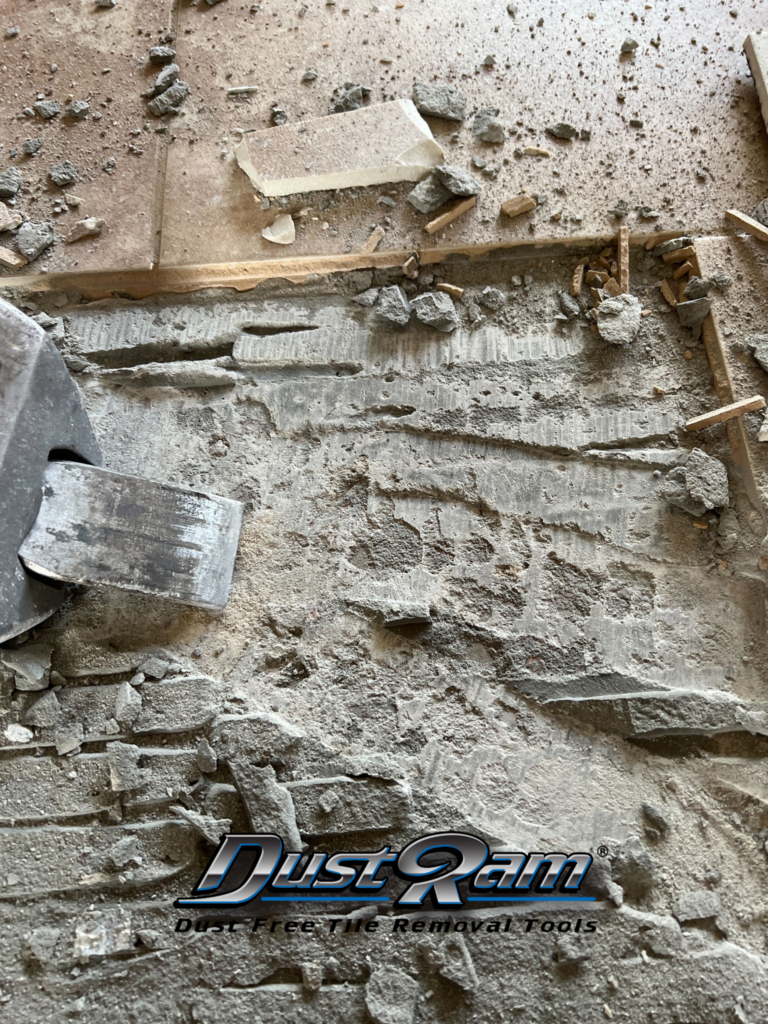
One of the unique features of the DustRam® system is how it grinds down the thinset all the way down to the slab. This comprehensive removal ensures there are no leftover adhesives, thinset, or other substances that can affect the bonding of the new flooring to the sub-floor. When the thinset is fully removed, it leaves the sub-floor in pristine condition, ready for the new flooring.
A clean, properly prepared sub-floor is key to ensuring proper floor bonding and adhesion for the new floor. Any residual debris, dust, or old adhesive can interfere with the bond between the new flooring material and the sub-floor, potentially leading to issues like loose tiles, cracks, or uneven surfaces over time.
With DustRam® dust-free tile removal, the sub-floor is left in a pristine state, providing the best possible base for your new flooring. This meticulous preparation can increase the longevity of your new floor and reduce future maintenance needs.
Investing in dust-free tile removal and proper sub-floor preparation can also enhance the value of your property. Homebuyers appreciate the attention to detail and the assurance that the flooring was installed correctly, adding to the appeal and value of your home.
Learn about the dangerous of respirable crystalline silica dust from tile removal and other construction related services.
https://www.dustram.com/blog/how-to-remove-tile-flooring/
While professional services like DustRam® offer unmatched results in dust-free tile removal and sub-floor preparation, some homeowners might consider preparing their sub-floors for tile installation themselves. If you’re considering this route, here’s a step-by-step guide to DIY sub-floor preparation:
Look for signs of water damage, rot, or other issues. Any damage should be repaired before proceeding.
Make sure the sub-floor is free of dust, debris, and old adhesive.
Use a long level to check for uneven spots. You might need to use a self-leveling compound to ensure a flat surface.
A primer can help the self-leveling compound adhere better.
Follow the manufacturer’s instructions closely. Once mixed, the compound should be poured immediately and spread evenly.
Allow the compound to dry fully before proceeding, typically 24 hours.
Use the level to check the surface again. If necessary, apply a second layer of the compound.
Once the compound is fully dry, sand it to achieve a smooth, even surface.
While the DIY route might seem appealing for its potential cost savings, it’s important to weigh the pros and cons.
• Personal satisfaction from completing the task
• Costs less up front
• Time-consuming
• Risk of errors leading to costly repairs
• The need for tools and materials
• Potential health risk from dust
• Costs more in the long-run (Damages, Health, and Professional Cleanings)
• Disruption and mess in your living space
On the other hand, choosing DustRam® for your dust-free tile removal and sub-floor preparation ensures a fast, clean, and efficient process. Our experts are equipped with proprietary tools and extensive experience, allowing them to ensure a job is done right the first time. We capture 99.9995% of the carcinogenic tile dust and leave your subfloor smoother and flatter!
https://www.dustram.com/blog/choosing-the-right-flooring/
Choosing a dust-free tile removal service like DustRam® ensures a cleaner, healthier home renovation experience, and the thorough sub-floor preparation sets the stage for a successful flooring installation. By investing in proper sub-floor preparation, you’re not only choosing a superior tile removal method, but also ensuring the longevity and quality of your new floor.
So, before you decide to dive into DIY, consider all the chaos and expenses you could avoid. Trust the experts at DustRam® – because a pristine sub-floor leads to a perfect flooring installation. Find out more about DustRam® and what separates us from other contractors in the industry.
“Embrace change without fear. Our comprehensive guide will equip you with the knowledge to remove old tiles and pave the way for a fresh, new look.”
Would you like to learn how to remove tile floor? Tile flooring is a great way to make any room feel elevated and add luxury. But if you’re a homeowner, contractor, remodeler, or renovator who’s looking for the best state-of-the-art methods to remove your old tile floor before replacing it, then you need to look no further! In this article, we’ll cover everything from what tools are necessary for the job to safety precautions that should be taken when working with hazardous materials like mortar so that in the end you can achieve an efficient and cost-effective tile removal process. Follow along with DustRam® for the inside scoop!
When it comes to tile removal, having the right tools is crucial. As a general contractor in the flooring industry, a trowel, hammer, and chisel are absolute must-haves. These tools allow you to chip away at the tiles and gradually remove them, without damaging the subfloor underneath. Without a trowel, hammer, and chisel, you could end up with a messy and time-consuming job on your hands. So, before you get started on any tile removal project, make sure you have these essential tools on hand. It will make all the difference in the end result.
□ Hammer
□ Mask or respirator
□ Chisel
□ Gloves and safety goggles
□ Pry bar – scraper
□ Vacuum
□ A multi tool
□ Painter’s tape
□ Sponge
□ Towels
□ Water bucket and other cleaning supplies
Begin by wearing your gloves and safety goggles. The removal process can send shards of tile and dust into the air, so it’s essential to protect your eyes and hands. Also, consider wearing a dust mask or a respirator to prevent inhalation of dust and debris. Before starting the tile removal, seal off the work area with plastic sheeting. This will help to prevent dust from spreading throughout your home. You can hang plastic sheets using painter’s tape.
Start at a corner or edge of the room and use the hammer to break a tile. It’s best to aim for the center of the tile. This action will create a starting point, making it easier to insert the pry bar underneath the remaining tiles.
Once you’ve broken a few tiles, insert the pry bar under the broken tile pieces. Using a little force, lever them up and off of the floor. Make sure to pry up both the tile and any adhesive that was used to attach it to the floor. Repeat this process to remove tile floor. For stubborn tiles, you may need to use the hammer and pry bar together to loosen them.
After all the tiles are removed, you’re likely to see leftover adhesive, thin set, grout, or even pieces of underlayment. Use the pry bar or a putty knife to carefully scrape this off. Be careful not to gouge the subfloor. Once you’ve removed the larger pieces, sweep or vacuum the area to remove any smaller debris. Dispose of the broken tiles and debris according to your local waste management regulations.
The subfloor must be in good condition, clean, dry, and smooth before you can install new flooring. Look for and repair any damage such as water damage or rot. If there are high spots, they may need to be ground down. Conversely, low spots may need to be filled with a leveling compound. Remember that an uneven subfloor can lead to an uneven tile installation or even broken or cracked tiles down the road. Additionally, ensure the subfloor is thoroughly cleaned – free from dust, debris, and adhesive residue – before proceeding with the new flooring installation. This preparation is crucial for ensuring the longevity of your new floor.
"Dust-free isn't a scale, it's a standard. With DustRam®, we don't just reduce dust, we eliminate it. Anything less isn't truly dust-free."
Carlton Dickerson
Many homeowners eagerly opt for “how to remove floor tile” in order to save money. While this might seem like a good idea at first, there are definitely pros and cons to consider before tackling this project on your own.
When you don’t have experience with this line of work, you could end up damaging your subfloor and needing costly repairs later on. Laying a new floor on uneven concrete can cause leveling and other foundational issues in the future.
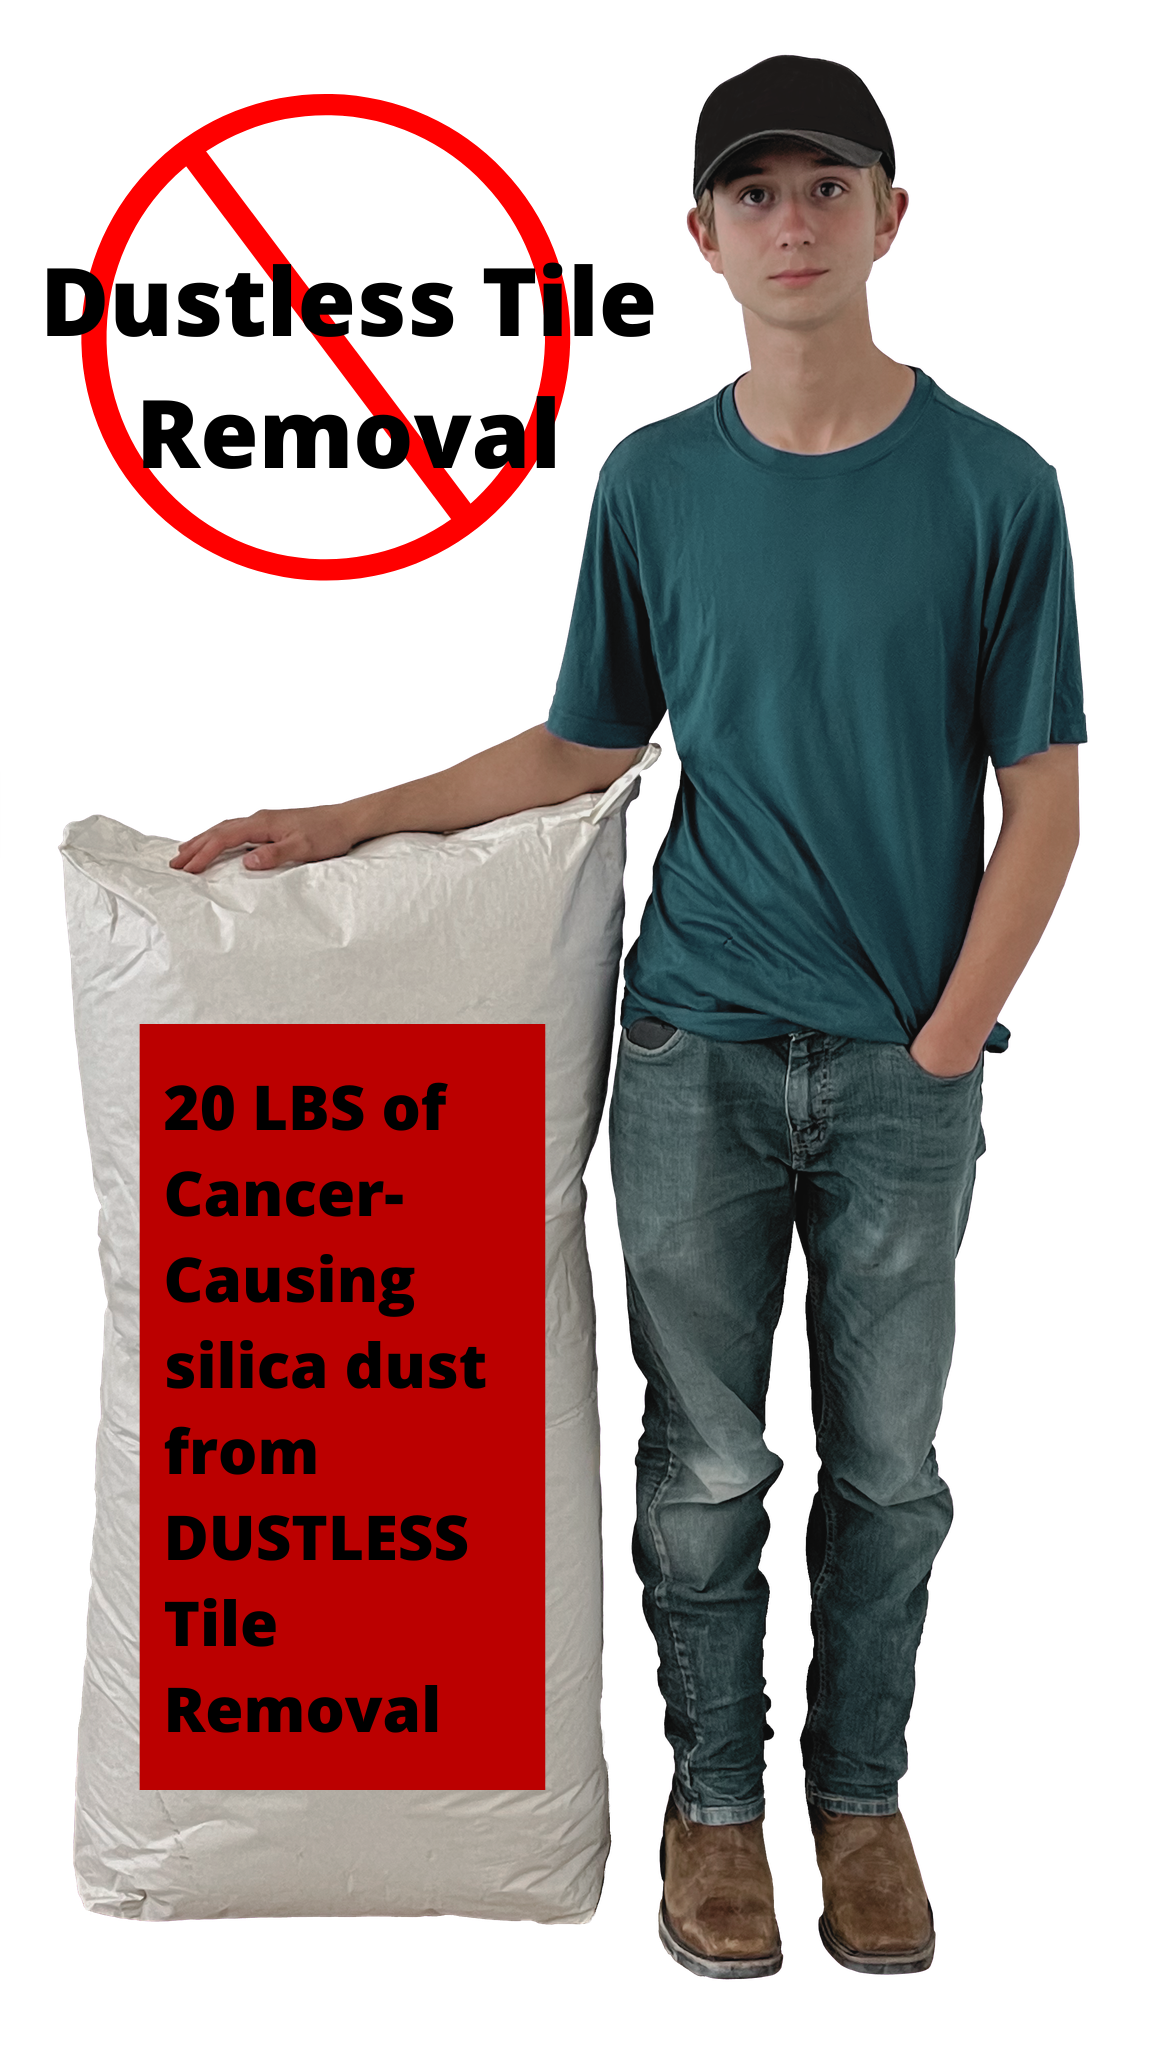
Removing tile flooring can be a time-consuming and messy task that requires extensive preparation and clean-up. On average one pound of dust is produced per removal of 1 square foot of tile. This means you may end up with hundreds of pounds of silica dust in your home.
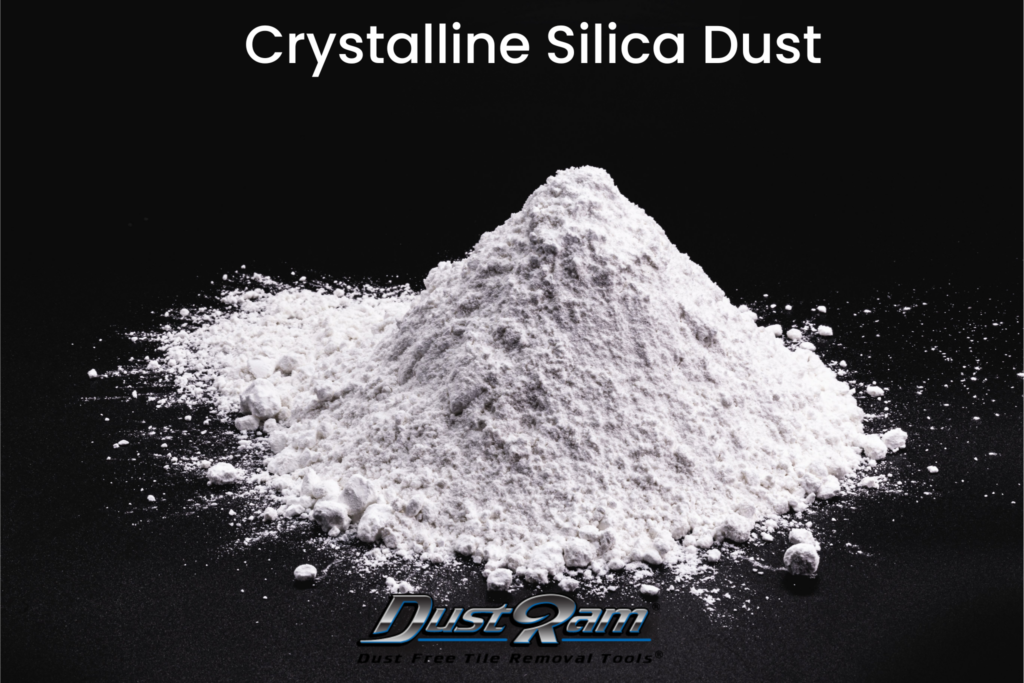
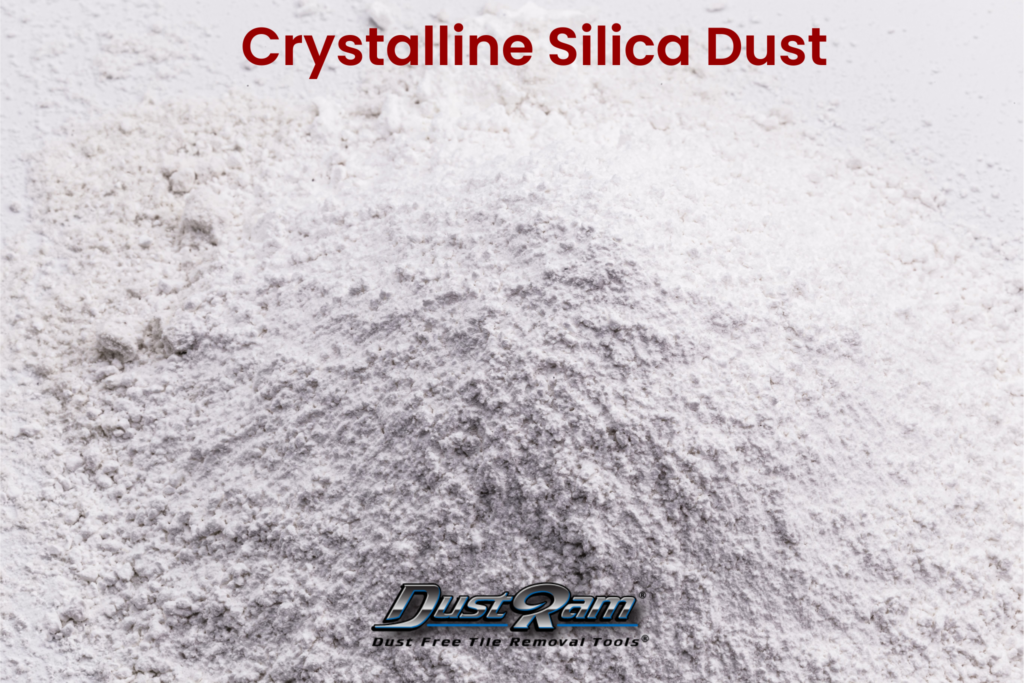
The most important disadvantage and the greatest one yet is the inevitable exposure to the cancer-causing silica dust that will engulf your home, and belongings, and end up in your lungs. See the video and image above***
With DIY comes dust exposure that will require professional cleaning sessions to remove the dust. Each cleaning typically ranges between $500 to $800 per session. With the large quantities of silica that your home will be exposed to, it will take months to years to remove the dust.
One key point to remember though is that not all of the dust will be possible to remove because of the nature and make up of the size of these particles. Each silica dust particle is one-hundred times smaller than 1 grain of beach sand. These microscopic particles are tough to get rid of completely.
Between the potential for subfloor damage and revision work, health care costs from silica inhalation, and professional cleaning sessions, you are going to spend significant amounts of more money than you first anticipated. The long term costs for a DIY tile removal end up costing more than if you hired a dust free flooring removal provider.
What you don’t know will end up costing you! Tile removal professionals in the industry have decades of ongoing experience. Sometimes it’s worth paying a little more for quality than to DIY and risk potential damages, etc. DustRam® has a 26 times patented system of advanced technology that was invented specifically for tile removal and to capture the carcinogenic dust from a floor removal.
One of the advantages of DIY tile floor removal is that it can be a money-saving endeavor, especially if you are already handy with tools.
You won’t have to pay for the labor costs associated with hiring a professional team. Plus, you’ll have the satisfaction of knowing you did it all yourself. On the other hand, removing tile floors can be a messy and time-consuming process.
Without the right tools and experience, it’s easy to damage your subfloor or end up with a less-than-perfect end result. That’s where products and technology like the DustRam® system can come in handy, making the process quicker, cleaner, and more efficient.
Ultimately, whether or not to take on a DIY tile floor removal project boils down to weighing the pros and cons and deciding what’s best for your particular situation. The decision to remove your own tile floors should be based on your personal skill level and timeline, as well as your willingness to take on the potential risks and challenges involved.
Have young children or family members with respiratory issues? The dust will affect their health. If your health and your family’s health are a priority, then without a doubt you should at least get a consult with DustRam®. The more information you have about the dangers of silica the better you will feel about your decision to hire an expert instead of DIY. Our consultations are free.
Speedy Fast Services:
Another great outcome of hiring DustRam® is the incredibly fast turnaround time. Our process and technology along with our trained and DustRam® certified professionals, allow the job to get done three times as fast compared to DIY and contractors that perform outdated tile removals.
You will not incur any added-on or hidden fees. What you are quoted is what you will pay. We are a company that runs on integrity and we have your best interest in mind. DustRam® offers payment options with 12 months of interest-free payment through GreenSky with immediate
Not only do we get the job done faster and cleaner, but we also leave your subfloor in the ideal condition making it easier for you to lay the new floor. With our 26 times patented system of tools and equipment, we grind the concrete down to the slab for a smoother flatter surface while also giving the concrete scarification for proper floor bond and adhesion.
Silica dust exposure is a serious issue that affects homeowners, workers, and even their pets. This microscopic dust is created when materials like rock, concrete, and sand are cut, ground, or drilled, and it can have dire consequences. As the dust gets inhaled, it can cause debilitating lung diseases like silicosis, lung cancer, and chronic obstructive pulmonary disease (COPD).
It’s not just the workers in construction and industrial settings who are at risk, either – homeowners who attempt to do renovations or repairs with outdated methods and equipment, are putting themselves at risk.
The costs of exposure can quickly add up, too, with medical bills, treatments, and even the need to hire a professional cleaning company to remove the dust. Fortunately, the DustRam® system is a solution that can help prevent exposure to crystalline silica dust, allowing workers and homeowners alike to breathe safely and without worry.
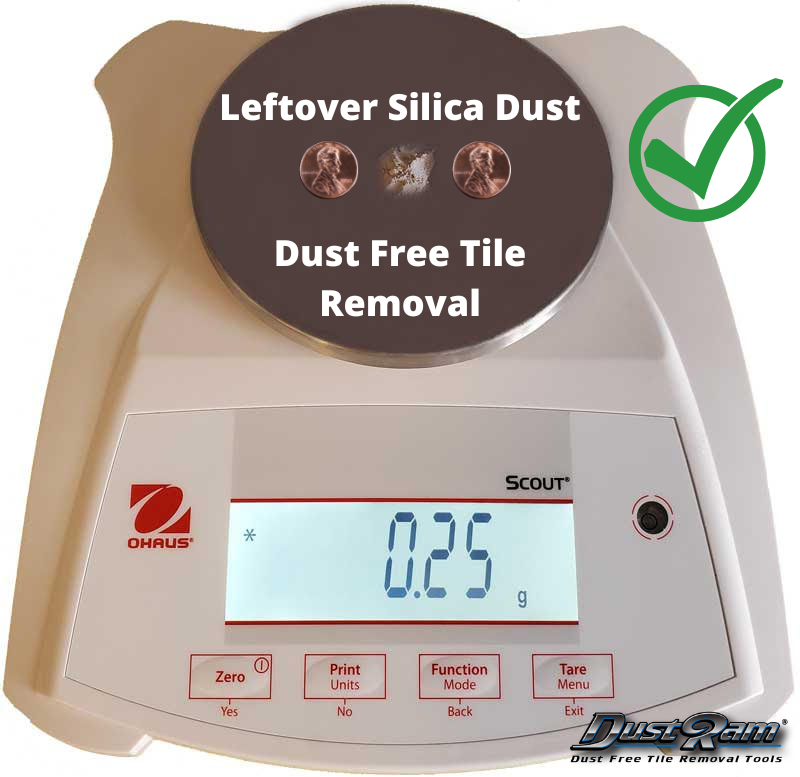
Silica dust has been recognized by OSHA and NIOSH as a carcinogenic substance that should not be inhaled at such quantities. If you’re looking to avoid the hazardous effects of silica dust exposure and inhalation, along with the unwanted cleaning costs and improper floor prep, consider leaving the heavy work to DustRam® – your lungs (and your wallet) will thank you. DustRam® captures 99.995% of crystalline silica dust, no other contractor or company can do this.
Related Post: Is Dust Free the Same as Dustless Tile Removal? Which One Is Safer?
Choosing the right tile floor removal company is a crucial decision that can significantly affect the outcome and cleanliness of your home or business during the removal process. Start by researching local companies, reading reviews, and assessing the services they offer. The company’s experience, reputation, and customer feedback are key factors that can provide insights into its reliability and proficiency.
While cost is an important consideration, it should not be the sole determining factor. Instead, focus on the company’s safety protocols, especially regarding the containment and management of silica dust, a harmful byproduct of tile removal. Ask potential companies about their containment methods, equipment used, and how they ensure minimal dust exposure during the process.
It’s also important to understand that traditional contractors will release dust back into the home because they use outdated equipment and are performing an outdated tile removal method. Dustless on the other hand will capture some of the dust but not enough to be considered dust free. Dustless still releases and exposes you to silica. Dust Free on the other hand, can only be performed by DustRam®. Unless a contractor is DustRam® certified, they are not Dust Free.
Hiring an expert is important because it eradicates any rookie mistakes from happening. An expert has already made rookie mistakes in the past and found solutions to prevent and avoid such mistakes from happening.
With an expert contractor, you won’t risk damages or worse. A professional company, like DustRam®, will offer comprehensive services, experienced technicians, and safe containment methods that protect your family, pets, and property.
Remember, the cheapest option may not always be the safest or most thorough, so prioritize quality and safety over cost. Don’t hesitate to request a free project quote from potential companies, and ensure they’re transparent about what their service entails.
Tired of messy, dusty tile removal that leaves your home looking like a construction site? Enter DustRam®, the tile removal company that revolutionized the industry with patented technology that eliminates dust and protects your home and loved ones from any debris.
DustRam® is not just any tile removal company, but the inventor of the dust free removal process and technology. We are the only provider of dust-free tile removal in the world, and our approach to tile removal is truly unique. With DustRam®, you can rest easy knowing that your home and your health are in good hands.
Other contractors do not use equipment that is designed for tile removal. Ours was created with the sole purpose of capturing the dust at the source at the highest levels and we do this effectively and efficiently.
Now let’s talk about the amazing qualities of DustRam® and how they have paved the way and set the tone for what a truly dust free tile removal should be. Not only are they the only providers of dust-free tile removal, but they also go above and beyond in their customer service.
Unlike traditional and dustless tile removal companies that use outdated methods that leave your home exposed to silica, DustRam®s technology is unique and in a league of its own, ensuring that no dust, debris, or mess is left behind. Their trained technicians work diligently to protect your home during the tile removal process, and the result is a picture-perfect finish that you can enjoy immediately.
Plus, they offer a free consultation and will even provide several demonstrations of their patented technology with plenty of before and afters on the website. With DustRam®, your tile removal experience will be stress-free, and your home will be left cleaner than it was before. Say goodbye to the mess and hello to the marvel that is DustRam®.

Hardwood flooring is a beautiful and timeless addition to any property. However, when it comes time to remove it, many homeowners are tempted to tackle the job themselves. While DIY hardwood floor removal might seem like a cost-effective option, it can be a complex and labor-intensive task that often leads to more problems than solutions. Nevertheless, we want to walk you through the step by step process to DIY and provide insight on when its time to hire dust free flooring removal experts.
Before we get started, you must first know about the signs that indicate it’s time to remove your hardwood flooring for a safer and healthier home environment.
Water damage: Flooring with water damage cannot be simply stained over. Additionally, water damage can lead to mold or mildew growth, which negatively impacts your health.
Mold or mildew presence: Mold is harmful to your health, making it necessary to replace the entire flooring.
Exposed nails: Loose nails pose a risk to you, your family, and your pets.
Excessive wear and tear: While minor scratches are normal, extensive damage warrants a new floor.
Creaking or shifting hardwood: These signs suggest damaged boards and indicate the need for hardwood floor removal.
Frequent refinishing: Each refinishing process sands down the floor, leaving floorboards too thin and prone to damage if done excessively.
Uneven flooring: This issue may point to problems with the sub-flooring beneath. Remove the hardwood to inspect the sub-flooring and joists for potential issues before installing new hardwood.
Structural issues: Over time, houses may settle too far into the ground, causing structural problems that necessitate hardwood floor replacement and professional intervention to address other structural concerns.
If you encounter any of these issues, consider replacing your hardwood flooring. Although it requires an investment, addressing these problems can save you from more work and expenses in the long run.
To further appreciate the complexities of hardwood floor removal, it’s essential to understand the step-by-step process involved:
Before removing the hardwood flooring, it’s crucial to assess its condition, the type of adhesive used, and the subfloor underneath. This information helps determine the best removal method and tools to use.
Proper preparation is critical to protect the surrounding areas from damage and contain dust and debris. This may involve covering furniture, sealing off vents, and setting up a dust containment system.
Depending on the type of hardwood flooring and adhesive used, various removal methods might be employed. These can include manual techniques (e.g., using pry bars and hammers) or using specialized tools such as walk-behind floor scrapers.
After the hardwood flooring is removed, the area must be thoroughly cleaned to remove any remaining debris and dust. This step can be particularly challenging for DIYers without access to professional-grade dust containment systems.
Once the area is clean, the subfloor must be prepared for the installation of new flooring. This may involve leveling the surface, repairing any damage, or removing adhesive residue.
Related Post: Buckling Hardwood Flooring: Causes, Prevention, and Repairs
Equip yourself with the right tools, safety gear, and techniques for a successful hardwood floor removal project.
To ensure a smooth hardwood floor removal process, assemble the necessary tools and safety gear:
-Measuring tape
-Hammer
-Pry bar
-Trim puller
-Circular saw
-Saw blade
-Sledgehammer
-Painter’s tool
-Multi-Max MM35
-Nail claw
-Locking pliers
-Vice grips
-Tarp
-Knee pads
-Work gloves
-Safety glasses
-Dust mask or N95 respirator
-Hearing protection
-Sturdy boots
Before starting, remove all furniture from the room. If you cannot remove everything or only need to remove a section of the floor, cover items to keep them clean. Use a tarp to protect surfaces from sawdust and debris, making cleanup easier later.
Determine the extent of your project, whether removing the entire floor or just a portion. Break the project into manageable sections and mark them with tape to stay organized and avoid accidental removal of undesired areas.
Score the baseboards along their full length where they meet the wall using a painter’s tool, box cutter, trim puller, or utility knife. This prevents paint or wallpaper tearing. Remove any nails or screws securing the baseboards or moldings with a pry bar or crowbar. Then, gently pry the baseboards from the wall every 8-10 inches.
If reusing the wood, avoid cutting it into small sections. For those not reusing the materials, use a circular saw to cut a small, marked section after removing baseboards. Ensure the saw blade is deep enough to cut the floorboards without damaging the subfloor. Cut the sheets into 3-foot sections in a perpendicular direction to the wood panels, making it easier for the saw to slide without hitting nails.
Carefully use a pry bar to lift each section of wood sheets. For wood reuse, gradually raise the sheets while moving the pry bar to prevent cracking. If not reusing the wood, apply force as necessary to lift the sections, keeping in mind that this may cause splitting.
After lifting all wood sheets, remove the nails and staples holding them in place. This step can be tedious, but essential for a clean removal. Use a nail claw and hammer or sledgehammer to pull out each nail and staple. A large magnet can help collect loose materials during cleanup.
Clean up sawdust and debris, even if you used a tarp to cover items. Vacuum the entire floor to create a clean workspace for the new flooring installation.
Congratulations on successfully removing your hardwood flooring! With the old floor gone, it’s time to consider new flooring options, such as reclaimed wood, to give your home a fresh look.
Removing hardwood flooring on your own can be an incredibly time-consuming process, especially if you have limited experience. What might take a professional team only a day or two can easily turn into a week-long project for a DIYer.
Most homeowners do not have access to the specialized tools required for efficient hardwood floor removal. Using improper tools can lead to frustration, longer removal times, and potential damage to your subfloor.
One of the most significant challenges with DIY hardwood floor removal is managing the copious amounts of dust and debris generated. Without proper dust containment systems, airborne particles will spread throughout your property, posing health risks and creating a mess that requires extensive cleanup.
Between professional cleanings and health costs from crystalline, silica dust exposure, your overall costs of DIY end up costing you more! Let DustRam® the inventor of dust-free flooring removal do the job for you! Find a DustRam® contractor near your city and get a free estimate.
Learn more about crystalline silica dust and why it’s so extremely dangerous.
Inexperienced DIYers run the risk of damaging their subfloor or surrounding areas during the removal process. This can lead to costly repairs and even more time spent on the project. DustRam® leaves your subfloor smoother and flatter and better prepared for the new floor installation. We grind down the thin-set, glue, and adhesive, down to the slab and give scarification for significantly better floor bonding.
Disposing of waste materials after a DIY hardwood floor removal can be problematic. Many municipalities have strict regulations regarding waste disposal, and improper handling can result in fines or other penalties.
https://www.dustram.com/blog/indoor-air-quality/

To further illustrate the advantages of choosing DustRam® for your hardwood floor removal needs, let’s compare the process with a typical DIY approach:
DIY removal can take several days or even weeks to complete, while DustRam®’s professional services can complete the project in a fraction of the time.
DIYers often lack the specialized tools needed for efficient removal, whereas DustRam® has access to advanced equipment designed for the job.
DIY removal can generate a significant amount of dust, which can be difficult to manage without proper containment systems. DustRam®’s system ensures a dust-free environment.
DIY removal carries a higher risk of damage to the subfloor and surrounding areas. DustRam® technicians utilize their expertise to avoid such issues.
DIY waste disposal can be challenging and potentially violate local regulations, while DustRam® ensures responsible and compliant disposal practices.
For more related content, be sure to check out the dust free flooring removal blog. You can also learn more about our process, +26 times patented equipment, and our payment options.
Long before the inception of DustRam®, flooring removal still existed. But the only methods that were being practiced were traditional and virtually dustless processes. One day, the frustration with the amount of dust that was created during the floor removal process ignited something in the mind Jack King. Jack had an idea to create a system that would protect workers and families from the dangerous silica dust produced during the removal of the tile floor.
Jack understood the extreme inconveniences of exercising methods that were not capturing sufficient dust and leaving the home completely swamped with silica. That is when DustRam® was created. The system is designed specifically to capture the dust during the tile chipping process, the exact moment it is created. This would ensure dust would never get released back into the home, preventing families and workers from getting exposed.
DustRam®’s dust-free tile removal is all about efficiency, safety, and making sure the dust never goes airborne. The overall attention to detail and quality control of our system and process are what make this the ultimate option for those who want better, faster, and cleaner results.
To understand the merits of DustRam®, it’s important to explore its advantages and why it stands out as the ultimate flooring removal solution in the world.
It starts with our dust-free experience. 99.99% of all silica dust is suctioned at the point of creation, making this a mess-free solution for flooring removal. Our patented vacuums make all the difference in ensuring the entire project remains dust free from start to finish.
Everything is done to make sure the dust is filtered, captured, and contained and never escapes into the air. This is what allows the DustRam® experience to be as clean and in tune with what a property owner is hoping for.
https://www.dustram.com/silica-dust/

Being able to rely on a solution that has been tested and perfected over the decades ensures the best results out on the market. Dust Free by DustRam® has been used in commercial, residential, and industrial settings so no project is too large for our system. Our contractors are trained and certified to use our revolutionary equipment and best practices at every job site. Exposure to silica dust can result in a variety of repiratory diseases.
The dust does not get released into the air when you choose DustRam®. Other contractors on the other hand, do not have the necessary technology to remove your tile, capture dust at such high rates, and contain the dust. With DustRam® 99.99% of the dust is suctioned and contained. Don’t expose your family and pets to the dust by hiring a contractor that performs outdated tile removal methods. Choose DustRam® contractors for the job.
https://www.dustram.com/dustless-vs-dust-free/

Dust exposure is dangerous and it is something that has to be controlled. To do this, a contractor must run an air quality test to understand the air quality levels from start to finish. This demands OSHA compliance and is how a contractor can ensure the air quality does not depreciate due to the flooring removal.
Our system is perfect for maintaining those air quality standards. Not only is DustRam® compliant, but we are also 50 times below OSHA’s silica exposure limit, making us THE dust-free solution. We provide better, faster, and cleaner tile removal.
https://www.dustram.com/dust-free-tile-removal/
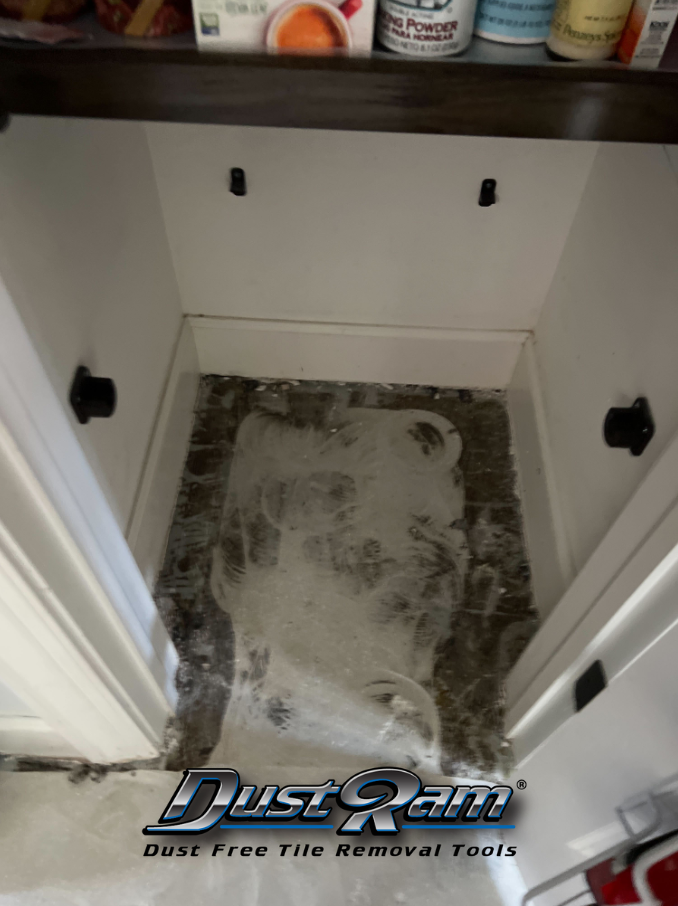
Aside from providing truly dust free results, our quality services don’t stop there. We grind down the thinset mortar, adhesives, glue and more – in an effort to leave you with the flattest, smoothest concrete subfloor. We do this to make the installation process easy. Our system also gives scarification which helps with better adhesion once the new floor is laid down. Quality floor preparation is something most contractors don’t do. This extra step also sets DustRam® apart from the rest.
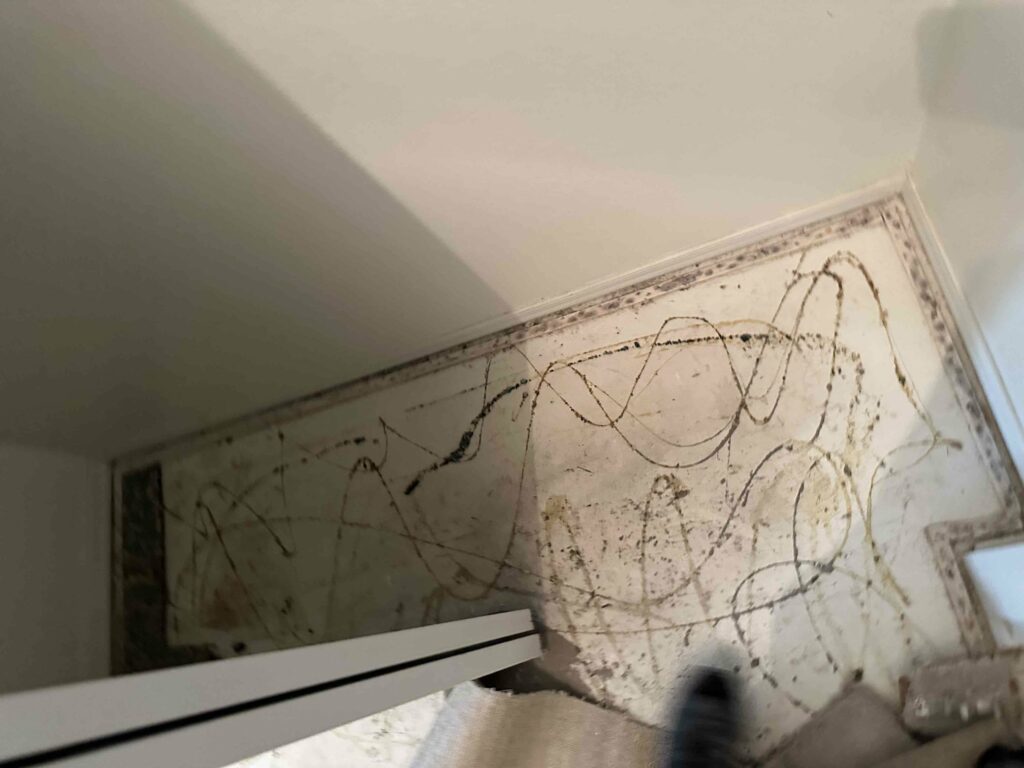
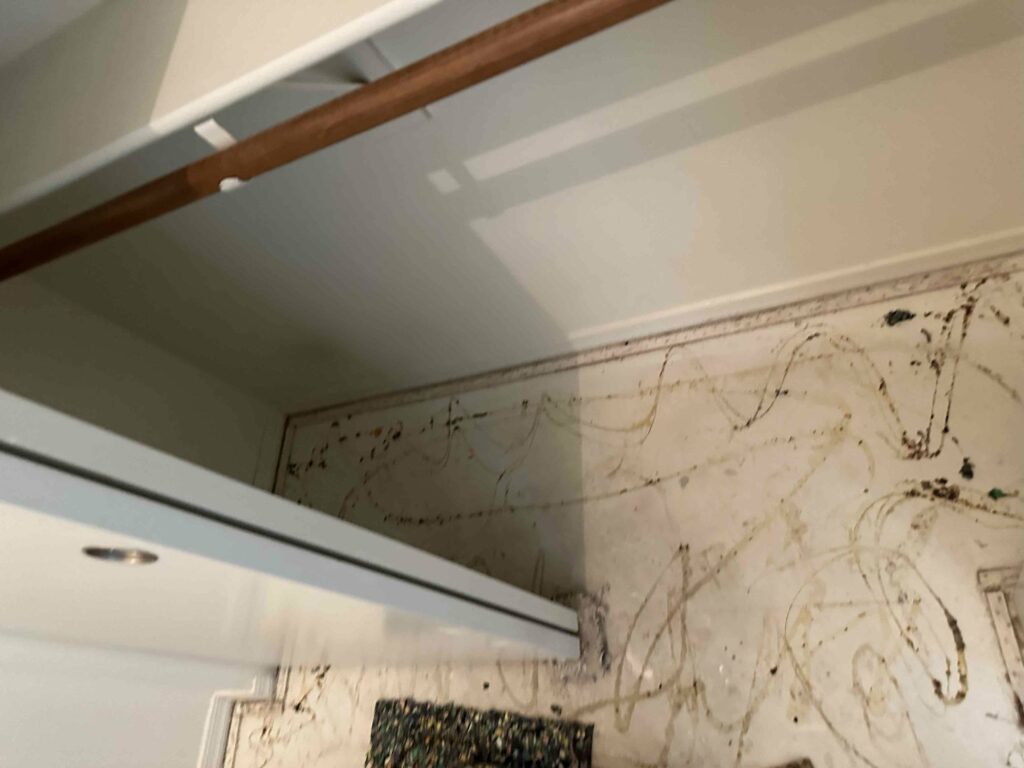
Extra costs with other flooring removal contractors would look like, medical bills, professional cleaning sessions, and potential floor preparation re-work. With outdated methods, tens to hundreds of pounds of dust are released back into the air in your home.
The dust travels through the vents and ends up on your walls, ceilings, clothes, shoes, pantry, pets, and much more.
-Silicosis
-COPD
-Cancer of the lungs
-A disease of the kidneys, and more
With so much dust in the home, most homeowners hire professional cleaning companies to remove the dust.
Cleaning sessions may take months to years for most of the dust to get cleaned up. This is another cost of outdated floor removal methods. You may also need to hire a contractor to fix or redo any low-quality work stemming from outdated technology used and or practices exercised. All of this can be prevented by hiring DustRam®
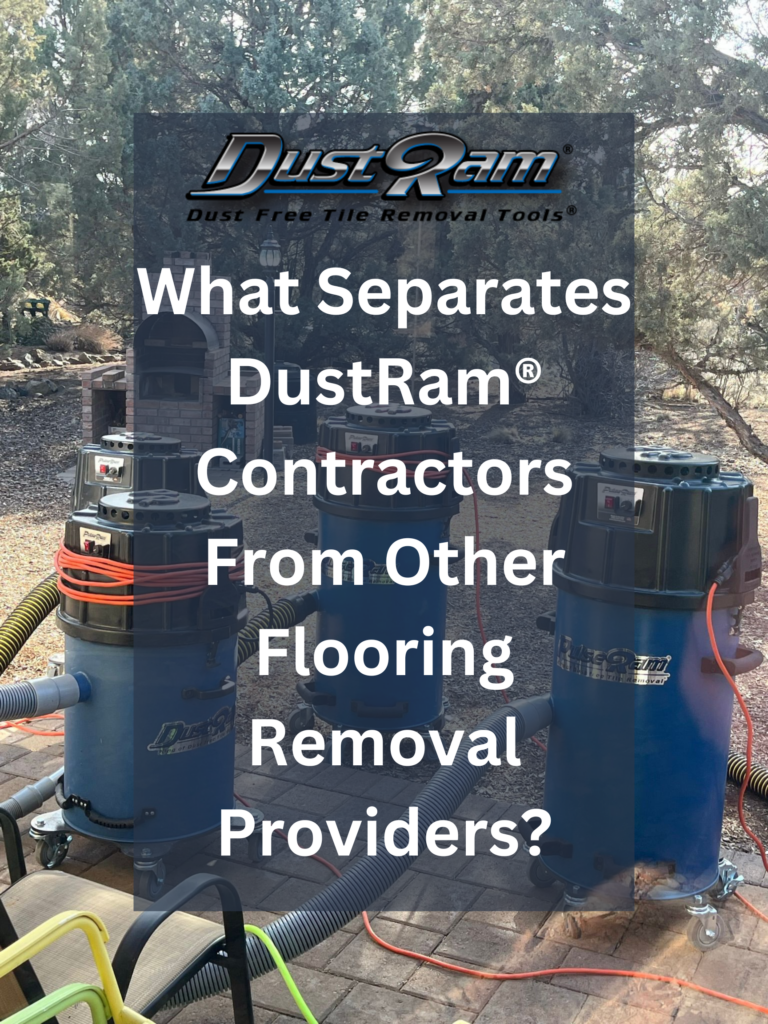
Dust Free and Ahead of the Competition – The DustRam® System
Unlike other flooring removal contractors, DustRam®’s equipment is specifically designed for tile removal. Our system is not used for other services like polishing concrete. DustRam® owns over 26 different patents on tools that create the revolutionary dust-free system for tile floor removal. From top to bottom, the system is designed to work to remove the tile faster, better, and cleaner.
Hiring a DustRam® contractor is the best action to take if you are in the market for flooring removal. Choose a top-quality result that won’t cost you hundreds to thousands of dollars in hidden costs. Find a DustRam® contractor in a city near you, and make sure to also check out our blog and videos for the latest news and trends.