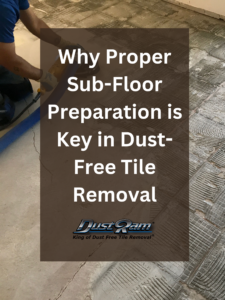
Why Proper Sub-Floor Preparation is Key in Dust-Free Tile Removal

Part 1: The Importance of Sub-Floor Preparation
When it comes to remodeling your home, a dust-free tile removal service is an excellent way to avoid the dust storms associated with traditional tile removal methods. While there are many aspects to this innovative service, one that can’t be overlooked is proper sub-floor preparation. By preparing your sub-floor adequately, you are setting the stage for an easy, clean, and successful flooring project.
Understanding Sub-Floor Preparation
Sub-floor preparation refers to the process of making sure the sub-floor, or the base upon which your tiles will be laid, is ready to receive the new flooring. This step is crucial because the condition of the sub-floor can significantly influence the longevity and quality of your new floor installation.
Why Sub-Floor Preparation is Crucial in Dust-Free Tile Removal
When you remove tiles using a dust-free tile removal service, you get a clean and dust-free environment, unlike traditional methods that can leave your space filled with dust for days. But the benefits don’t stop there. With a service like DustRam® dust-free tile removal, the sub-floor preparation is unparalleled.
Going All the Way Down to the Slab
One of the unique features of the DustRam® system is how it grinds down the thinset all the way down to the slab. This comprehensive removal ensures there are no leftover adhesives, thinset, or other substances that can affect the bonding of the new flooring to the sub-floor. When the thinset is fully removed, it leaves the sub-floor in pristine condition, ready for the new flooring.
Ensuring Excellent Bonding and Adhesion
A clean, properly prepared sub-floor is key to ensuring proper floor bonding and adhesion for the new floor. Any residual debris, dust, or old adhesive can interfere with the bond between the new flooring material and the sub-floor, potentially leading to issues like loose tiles, cracks, or uneven surfaces over time.
With DustRam® dust-free tile removal, the sub-floor is left in a pristine state, providing the best possible base for your new flooring. This meticulous preparation can increase the longevity of your new floor and reduce future maintenance needs.
Enhancing the Value of Your Property
Investing in dust-free tile removal and proper sub-floor preparation can also enhance the value of your property. Homebuyers appreciate the attention to detail and the assurance that the flooring was installed correctly, adding to the appeal and value of your home.
Learn about the dangerous of respirable crystalline silica dust from tile removal and other construction related services.
Part 2: DIY Subfloor Preparation for Tile Installation
While professional services like DustRam® offer unmatched results in dust-free tile removal and sub-floor preparation, some homeowners might consider preparing their sub-floors for tile installation themselves. If you’re considering this route, here’s a step-by-step guide to DIY sub-floor preparation:
1. Check the Sub-floor for Damage:
Look for signs of water damage, rot, or other issues. Any damage should be repaired before proceeding.
2. Clean the Sub-floor:
Make sure the sub-floor is free of dust, debris, and old adhesive.
3. Level the Sub-floor:
Use a long level to check for uneven spots. You might need to use a self-leveling compound to ensure a flat surface.
4. Apply Primer:
A primer can help the self-leveling compound adhere better.
5. Mix and Apply the Self-Leveling Compound:
Follow the manufacturer’s instructions closely. Once mixed, the compound should be poured immediately and spread evenly.
6. Let It Dry:
Allow the compound to dry fully before proceeding, typically 24 hours.
7. Check the Surface Again:
Use the level to check the surface again. If necessary, apply a second layer of the compound.
8. Sand the Surface:
Once the compound is fully dry, sand it to achieve a smooth, even surface.
DIY Floor Preparation: The Pros and Cons
While the DIY route might seem appealing for its potential cost savings, it’s important to weigh the pros and cons.
Pros of DIY:
• Personal satisfaction from completing the task
• Costs less up front
Cons of DIY:
• Time-consuming
• Risk of errors leading to costly repairs
• The need for tools and materials
• Potential health risk from dust
• Costs more in the long-run (Damages, Health, and Professional Cleanings)
• Disruption and mess in your living space
On the other hand, choosing DustRam® for your dust-free tile removal and sub-floor preparation ensures a fast, clean, and efficient process. Our experts are equipped with proprietary tools and extensive experience, allowing them to ensure a job is done right the first time. We capture 99.9995% of the carcinogenic tile dust and leave your subfloor smoother and flatter!
How to Choose the Right Flooring for Your House?
In Conclusion,
Choosing a dust-free tile removal service like DustRam® ensures a cleaner, healthier home renovation experience, and the thorough sub-floor preparation sets the stage for a successful flooring installation. By investing in proper sub-floor preparation, you’re not only choosing a superior tile removal method, but also ensuring the longevity and quality of your new floor.
So, before you decide to dive into DIY, consider all the chaos and expenses you could avoid. Trust the experts at DustRam® – because a pristine sub-floor leads to a perfect flooring installation. Find out more about DustRam® and what separates us from other contractors in the industry.